Saturday, September 28, 2019

PEANUT BUTTER FUDGE CUPS

COOKIE
  • 1/2 cup butter, softened {or coconut oil}
  • 1/2 cup creamy peanut butter
  • 1/2 cup white sugar
  • 1/2 cup packed brown sugar
  • 1 egg
  • 1/2 teaspoon vanilla extract
  • 1 1/4 cups all-purpose flour
  • 3/4 teaspoon baking soda
  • 1/2 teaspoon salt
Fudge Filling:
  • 1 cup milk chocolate chips
  • 1 cup semi-sweet chocolate chips
  • 1 (14 ounce) can sweetened condensed milk
  • 1 teaspoon vanilla extract
  1. Preheat oven to 325 degrees F (165 degrees C). Spray a mini muffin pan liberally with cooking spray. Using a hand mixer, cream butter, peanut butter and white and brown sugars. Mix in egg and 1/2 teaspoon vanilla. Add in flour, baking soda and salt, stirring until combined.
  2. Measure out dough into 1 TBSP scoops. {I use my 1 TBSP cookie scoop so this process is super fast!} No need to shape the cookies, just place each scoop in one compartment of a mini muffin tin. Bake for 14 to 16 minutes or until lightly browned.
  3. Remove from oven and immediately make wells in the center of each using a melon baller or a 1 tsp measuring spoon. Make a good sized well in the center so that you can add a lot of fudge! Cool in pan for 8-10 minutes. Then carefully remove to wire racks. I used coconut oil in my recipe, so the cookies popped out super easily. If you use butter, you should spray the muffin pans well, as instructed earlier, so that your cookies come out easy too! Cool for an additional 10-15 minutes.
  4. While the cookies are cooling, you can prepare the fudge filling. Combine the chocolate chips and sweetened condensed milk in a microwave safe bowl. Mix lightly and microwave on high for 1-2 minutes. The mixture doesn’t look melted, but give it a few gentle stirs and you’ll see it’s heated well enough. Add vanilla and stir again until smooth.
  5. Transfer about half the fudge into a quart-sized ziplock bag. Squeeze the fudge into a corner and snip the corner off. Now you can easily pipe the fudge into the cookies! The great thing about this fudge too is that it sets up super fast, so feel free to fill the cookies well, so that the fudge goes above the cookie- it will set up and not run out! If your fudge gets too solid, just pop it back in the microwave for 10-15 seconds.
  6. Heat up about 1 TBSP peanut butter in a small baggie and then drizzled it over the tops of my fudge cups.

Melted Snowman Tea Light Ornaments

 So cute

Materials

  • Tea Light
  • Ribbon
  • 1 piece White, Brown, and Black Cardstock Paper
  • Glue stick/hot glue gun
  • Black sharpie
  • Snow glitter
  • Scissors
  • Glitter glue, pom poms, colored paper, etc. (Optional)

Instructions

  • Cut three circles out of white cardstock paper; large, medium, and small size making sure they will fit around the tea light. (Optional: Use a sharpie and lightly go around the edges of the circles to make them stand out more)
  • Poke the circles through the middle of the tea light. Draw eyes and dots for a mouth around the smallest circle using a sharpie.
  • Cut out 2 brown arms and glue them on the biggest circle.
  • Cut out a black hat or a colored pom pom hat and glue on the small/medium circle.
  • Using a glue stick, put it all over the snowman. Shake the snow glitter on and dump excess.
  • Cut a ribbon and make a "V" with hot glue around the light switch on the back. Attach the ribbon and hold for a few seconds.
  • Hang on the Christmas tree and turn on the light                            !https://www.craftymorning.com

Tuesday, September 24, 2019

OMHGWW 9/23

Come join our party and meet new bloggers and lots of ideas.

Welcome to Wonderful Wednesday!! We always get a head start each week and our Co-Hosts choose from the previous week’s links and we are featuring 7 blogs on week #174!! I am sure that you will find it both fun and interesting to meet and make friends with our Co-Hostesses and Bloggers through our party and we appreciate your visit today! Just a few Guidelines: 1-Link Up Your Posts 2-Visit and Comment on the 2 posts before yours in the Linky 3-Leave your Hostess a Comment We look forward to your recipes, reviews, DIY crafts, gardening hints, travel, beauty ideas, jewelry you make, paper crafts, your home, home ideas, and decor plus Linky Parties & Giveaways are all welcome!Oh-My-Heartsie-Girls-WW❢❢ Posting our Party Banner is not a requirement but we would appreciate it. » Link « on your site for others to enjoy the party each week! Last weeks features can Be Seen Them Here» Last Week Features ❢:❢ And Please Feel Free To Pin A Few Features From Original Source Be Notified When Our Parties Start Each Week Add Your Email Unsubscribe Anytime ❢: [...]Karren Haller // Oh My Heartsie Girl How To Turn Your Home a Little Greener Twitter | Bloglovin | Facebook | Pinterest | InstagramDivider 989321gyey13hzitIndah Nuria Savitri // My Purple World What to see in Red Square, Moscow Twitter | Facebook | Pinterest | Instagram Divider 989321gyey13hzitClearissa Coward // Command Center Three Myths Of Home Organization Twitter | Instagram | Facebook | Pinterest Divider 989321gyey13hzitSuzan White // Country Crafting Caramel Apple Nachos Twitter | Instagram | Facebook | Pinterest Divider 989321gyey13hzitAlice V // DIYerfy DIY Dollar Store Halloween Mesh Wreath Twitter| Instagram | Facebook | PinterestDivider 989321gyey13hzit Kaycee Mason DIY Halloween Party Plans: Crafts, Games, Recipes & More Twitter | Instagram | Facebook | Pinterest Divider 989321gyey13hzit...Best Picks from last weeks party

Feature Chosen by Karren // Oh My Heartsie Girl Pennys Vintage Treasures // A Back Porch Mantel Feature Chosen by Co-Hostess Kaycee D Mason // My Crafty Zoo Across The Blvd. // Sweater Pumpkins Made Using Old Sweater and Dollar Store Banner Feature Chosen by Co-Hostess Clearissa // Clearissa's Command Center Artful Homemaking // How to Make Beeswax Candles | Easy DIY Tutorial Feature Chosen by Co-Hostess Alice // DIYerfy Chas Crazy Creations // Using A Wood Burning Tool Feature Chosen by Co-Hostess Suzan White // Country Crafting Debbi Dabble // Dollar Store Haul and a New Fall Wreath Feature Chosen by Co-Hostess Indah // My Purple World Jodie Fitz // Apples & Cheese make the Perfect Fall Snack Combination Feature Chosen by Karren // Oh My Heartsie Girl Marilyns Treats // No-Bake Pumpkin Cheesecake

But Now......Lets Party....

You are invited to the Inlinkz link party!

Click here to enter

Thursday, September 19, 2019

NEW PROJECTS

    Hi,
Been a beautiful day outside so far, a nice breeze and only going to 85. That's a good break from the 90's. Its been to stinking hot....I finally gave in and went to urgent care today, for my sinus. I couldn't hear out of left ear when I woke today and my eyes were crusty. So I'm on antibiotics and should start to feel better by Sunday.............good cause I have a lot to do for Nov show. 
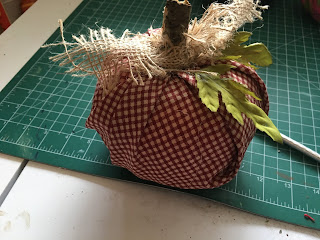
I have been working on candles and tarts , but I quit till my colored ink gets here to make the labels. I should be here in 3 days. Meanwhile I made a few pumpkins,. and another fall wreath. But today I'm taking a break to give medicine chance to work.


CARAMEL APPLE NACHOS

What are the ingredients in Caramel Apple Nachos?

  • 30 large marshmallows
  • 5 Tbsp butter
  • 35 caramels
  • 1 Tbsp water
  • 4-5 apples, sliced
  • toppings (peanuts, sprinkles, mini chocolate chips, crushed candy bars, etc)

How do you make Caramel Apple Nachos?

  1. Melt the marshmallows and butter in a saucepan over low heat.  Stir periodically until completely melted and smooth.
  2. Combine the caramels and water in a bowl and microwave until melted.  I microwaved mine in 45 second intervals, stirring in between until the caramel was smooth.
  3. Arrange the sliced apples on a plate and pour the caramel and marshmallow mixtures over them.  Add any additional toppings and serve immediately!  Enjoy!
  4. FOUND ON; BUTTER with a side of BREAD
  5. would be great for football party

Wednesday, September 18, 2019

SALTED CARAMEL THUMBPRINTS

Ingredients

  • 1 cup (2 sticks) butter, softened
  • 2/3 cup sugar
  • 2 eggs
  • 2 TBSP honey
  • 2 tsp vanilla
  • dash of salt
  • 2 cups flour
  • coarse sea salt, for topping
  • 2 cups pretzels, broken into pieces
  • 14 oz dulce de leche

Instructions

  1. In a mixing bowl, beat butter and sugar until fluffy. Then, add in eggs, honey and vanilla. Beat until combined. Gradually, add in flour and salt and mix until semi firm.
  2. Place dough in the refrigerator for 30 minutes.
  3. Preheat oven to 350 degrees. Line a flat rimmed baking sheet with parchment paper or mats.
  4. Add broken pretzels into a small bowl. Scoop dough and roll into balls about the size of a walnut. Roll dough in pretzel pieces and place on prepared baking sheet approx 1-2 in apart. Gently press your thumb in the middle of the cookie to form a small well.

Tuesday, September 17, 2019

OMHGWW 9 18

Welcome to Wonderful Wednesday!! We always get a head start each week and our Co-Hosts and I choose from the previous week’s links from 8 blogs on week #173!! I am sure that you will find it both fun and interesting to meet and make friends with our Co-Hostesses and Bloggers through our party and we appreciate your visit today!

Oh-My-Heartsie-Girls-WW❢❢ We would love if you would post our Party Banner or this » Link « on your site for others to enjoy the party each week! And if you looking for something special from last week, you Can Still See See Them Here» Last Week Features ❢:❢ We look forward to your recipes, reviews, DIY crafts, gardening hints, travel, beauty ideas, jewelry you make, paper crafts, your home, home ideas, and decor plus Linky Parties & Giveaways are all welcome! And Please Feel Free To Pin A Few Features From Original Source Be Notified When Our Parties Start Each Week Add Your Email Unsubscribe Anytime ❢: [...]Karren Haller // Oh My Heartsie Girl 5 Wardrobe Essentials Every Woman Needs to Transition from Summer to Fall Twitter | Bloglovin | Facebook | Pinterest | InstagramDivider 989321gyey13hzitIndah Nuria Savitri // My Purple World Traveling to Ombilin Coal Mining Heritage Site of Sawahlunto Twitter | Facebook | Pinterest | Instagram Divider 989321gyey13hzitClearissa Coward // Command Center Choosing Your Bathroom Accessories For Storage Twitter | Instagram | Facebook | Pinterest

Divider 989321gyey13hzitSuzan White // Country Crafting Never Forget 911 Twitter | Instagram | Facebook | Pinterest Divider 989321gyey13hzitAlice V // DIYerfy Tissue Paper Flowers for Day of the Dead Twitter| Instagram | Facebook | PinterestDivider 989321gyey13hzit Kaycee Mason DIY Halloween Party Fun & A Giveaway Twitter | Instagram | Facebook | Pinterest Divider 989321gyey13hzit...Best Picks from last weeks party

Feature Chosen by Co-Host Clearissa Coward // Clearissa Coward's Command Center The Painted Apron // Fall Tablescapes Favorites Feature Chosen by Co-Host Suzan White // Country Crafting Decor Craft Design // Fall Leaf in Watercolor-With Quote

Feature Chosen by Co-Host Indah Nuria SavitrI // My Purple World Thrifted Nest // Easy DIY Modern Farmhouse Fall Wreath Two WaysFeature Chosen by Co-Host Alice V // DIYerfy Artful Homemaking // How to Make Velvet Pumpkins Simple DIY TutorialEffective Ways To Build a Brand With Instagram and EmailsFeature Chosen by Co-Host Kaycee Mason// My Crafty Zoo Oh My Heartsie Girl// Effective Ways To Make Email Marketing And Instagram Work TogetherFeature Chosen by Host Karren // Oh My Heartsie Girl Nutz About Stamping // Adding Beautiful Embellishments To Your CardsFeature Chosen by Host Karren // Oh My Heartsie Girl 3 Boys and a Dog // The Best Red Velvet Iced Brownie Recipe Feature Chosen by Host Karren // Oh My Heartsie Girl Amys Pursuits // Grandma and Me A Beautiful Day In The Park in Shades of Blue

But Now......Lets Party..

You are invited to the Inlinkz link party!

Click here to enter

Best Bud

  He is my best friend,he stays right by my side . I wonder how he will react when hopefully I don't need the w/c anymore. ...